Can We Eat Egg and Cabbage? Yes, we can, and it’s good for us. Eggs have about 6 grams of protein per large egg. Cabbage is full of vitamin C. Together, they make a healthy and tasty meal. A cup of chopped cabbage has 22 … Read more
Start your day with a delicious cabbage and egg recipe. It’s ready in just 15 minutes. This recipe is packed with nutrients to kickstart your day. It takes only 5 minutes to prepare and 10 minutes to cook. So, you can have a healthy meal … Read more
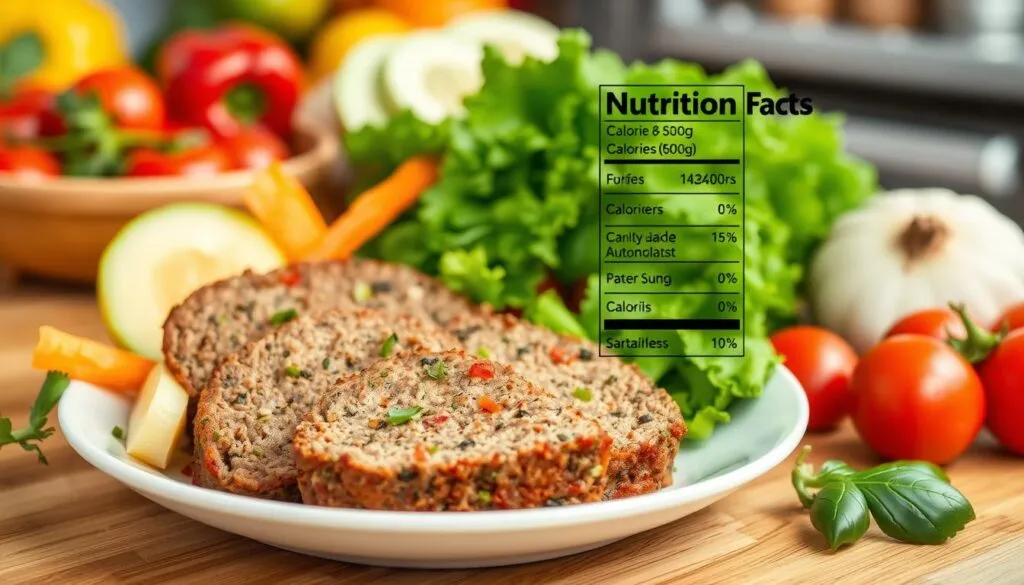
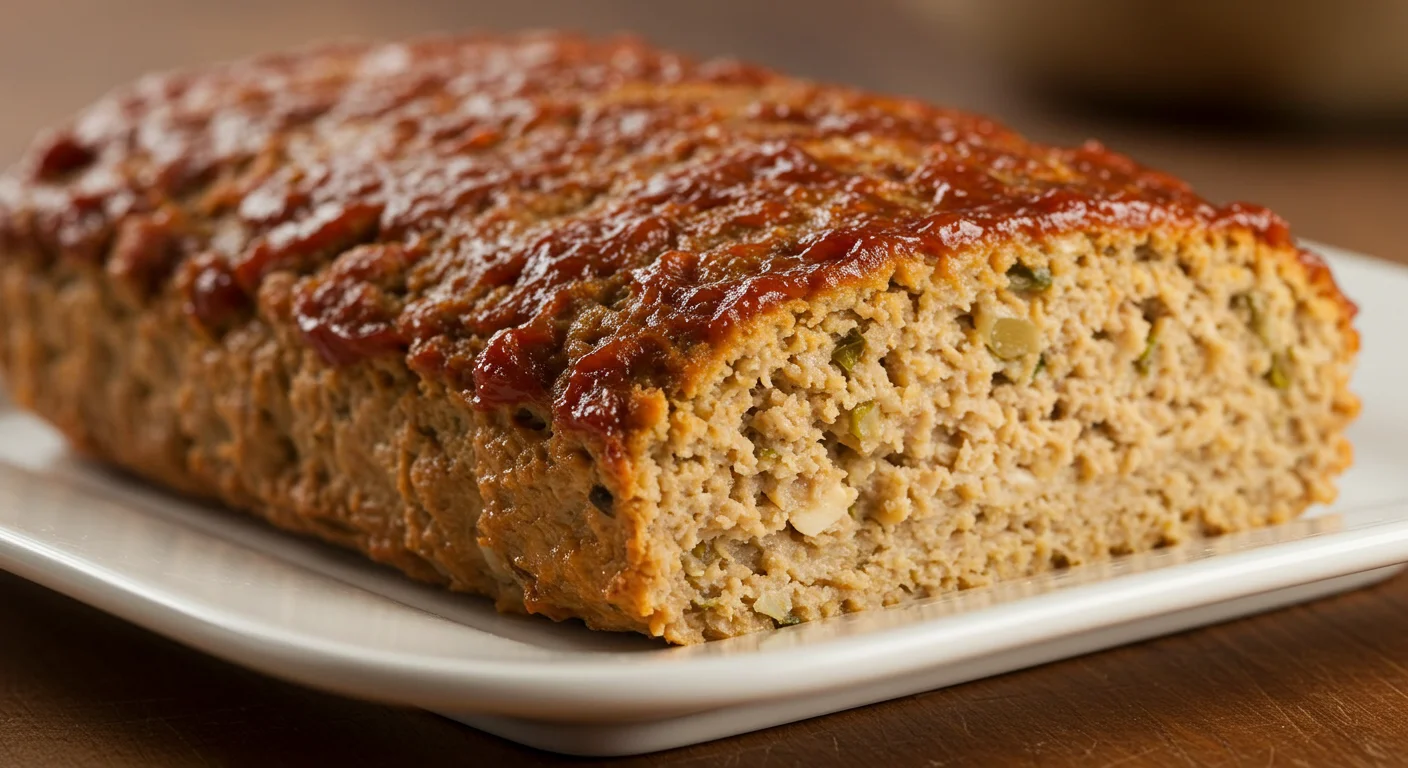
When you ask Is meatloaf healthy? look at its ingredients and nutrition. Each serving has 248 calories, 28g of protein, and 5g of fat. If made with lean ingredients and eaten in the right amounts, meatloaf can be good for you. You can find many healthy meatloaf recipes that use lean proteins and veggies, making it a tasty and nutritious part of a healthy diet.
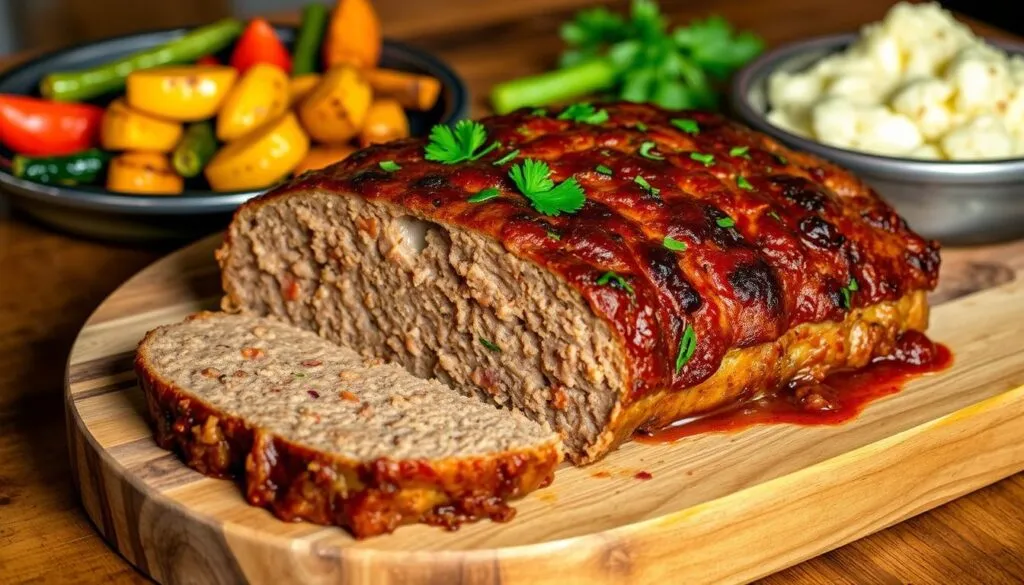
Exploring meatloaf, you’ll find it can be made in many ways. You can use traditional beef or leaner meats like ground turkey, bison, and buffalo. The secret to a healthy meatloaf is choosing the right ingredients and watching your portion sizes. With some creativity, you can make a meatloaf that fits your diet and tastes great, proving meatloaf can be healthy.
By picking healthy meatloaf recipes and knowing what’s in them, you can have a meal that’s both tasty and good for you. Whether you want something low in carbs or sugar, there are many healthy meatloaf recipes to try. So, when you wonder if meatloaf is healthy, remember it can be with the right ingredients and portion sizes, making it a great choice for a balanced diet.
Understanding Traditional Meatloaf Composition
Traditional meatloaf is made with ground beef, eggs, and breadcrumbs. These ingredients are high in protein but also in fat and calories. Knowing the nutritional value of these ingredients is key to making better choices.
A typical serving of meatloaf has 250-300 calories. It also has 20-25 grams of protein and 15-20 grams of fat. The sodium content can be high, with up to 1,000 mg per serving. To make it healthier, use leaner ground beef or turkey. Also, use less breadcrumbs and eggs.
Common Ingredients in Classic Meatloaf
Ground beef
Eggs
Breadcrumbs
Onions and garlic for flavor
Vegetables like bell peppers and spinach for added nutrition
Standard Nutritional Profile
A standard serving of meatloaf has 10-15 grams of carbohydrates and 0-2 grams of fiber. It can also have up to 1,000 mg of sodium per serving. To make it healthier, use herbs and spices for flavor instead of salt. Also, reduce the amount of sodium-rich ingredients.
Portion Size Considerations
The recommended portion size for meatloaf is 4-6 oz, about the size of your palm. Eating larger portions can increase calorie and fat intake. It’s important to be mindful of the serving size to make informed choices.
Is Meatloaf Healthy? Breaking Down the Facts
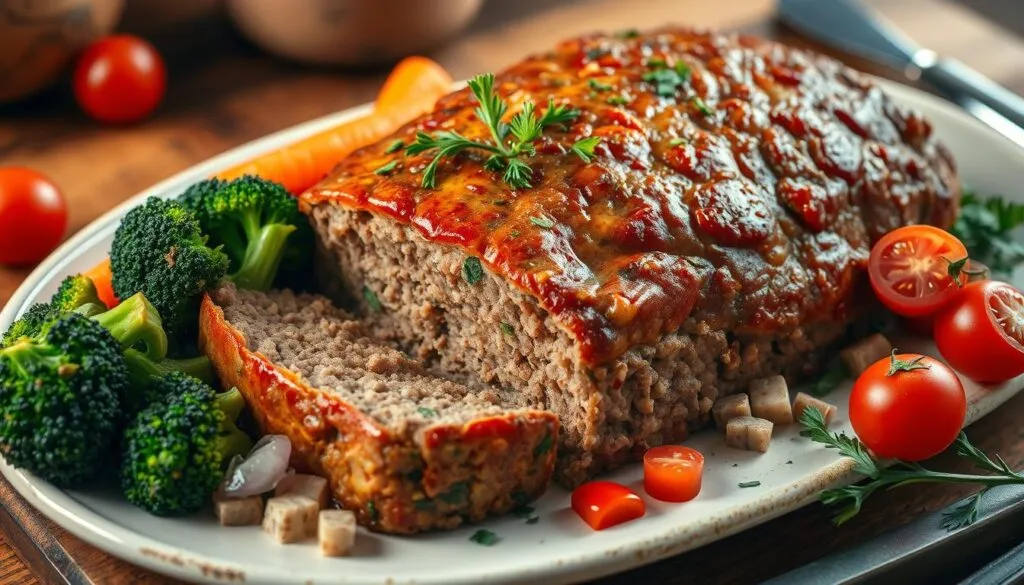
When we ask if meatloaf is healthy, we need to look at both sides. A meatloaf high in protein can be good if it’s made with lean ingredients and eaten in the right amount. You can find many recipes to make a meatloaf that fits your diet and taste.
Studies say a good meatloaf has 80% meat and 20% fat. You can use ground beef, lamb, pork, turkey, or veal for a traditional meatloaf. Or, you can try vegetarian options like chickpeas, lentils, or finely chopped veggies.
Here are some tips for a healthy meatloaf:
Choose lean meats and cut down on fat.
Add veggies like onions, peppers, or carrots for moisture and taste.
Eggs or egg yolks help with moisture and sticking together.
Use herbs and spices for flavor instead of salt and sugar.
By paying attention to these tips and trying different ingredients, you can make a tasty and healthy meatloaf. Whether you want a meaty or veggie option, the secret is finding the right balance and eating it in moderation.
The Protein Power of Meatloaf
Meatloaf is a great source of protein. It has all the amino acids your body needs for muscle growth and repair. A typical serving of meatloaf can have up to 16.7g of protein.
Let’s look at what’s in a meatloaf recipe:
Nutrient
Per Serving
Calories
161kcal
Protein
16.7g
Fat
6.5g
Saturated Fat
2.4g
Sodium
268.1mg
Meatloaf is a nutritious choice for a balanced diet. Knowing about meatloaf nutrition helps you make better choices for your health.
Hidden Sources of Fat and Sodium
Traditional meatloaf recipes often hide fat and sodium. To make a low-fat version, knowing these sources is key. The type of meat used is a big fat contributor. Some recipes mix ground meats that are high in fat.
Looking at traditional meatloaf ingredients shows they add a lot of fat and sodium. Bacon, sausage, and processed meats are high in fat and sodium. High-sodium condiments and sauces also increase sodium levels.
To make a healthier meatloaf, use leaner meats and less sodium-rich ingredients. Here are some tips to help you:
Choose leaner meats, such as ground chicken or turkey, to reduce the fat content of your meatloaf.
Use herbs and spices to add flavor instead of relying on high-sodium condiments and sauces.
Opt for low-sodium broth or stock to add moisture to your meatloaf without increasing the sodium content.
By watching out for hidden fat and sodium in traditional meatloaf, you can make a healthier, low-fat version. A few ingredient and cooking method changes can make your meal delicious and nutritious.
Nutrient
Amount per serving
Daily value
Calories
395 kcal
Total fat
24g
37%
Sodium
707mg
31%
Potassium
638mg
18%
Making Your Meatloaf Healthier: Smart Ingredient Swaps
To make your meatloaf healthier, try swapping out ingredients for leaner ones. Use ground turkey or chicken instead of beef to cut down on fat. This way, you can enjoy a nutritious and tasty meal.
Lean Meat Options
Choosing lean meats is a smart move for a healthier meatloaf. Here are some good options:
Ground turkey
Ground chicken
96% extra lean ground beef
These choices help you make a meatloaf that’s lean but full of flavor.
Vegetable Integration
Adding veggies to your meatloaf boosts fiber and nutrients. Try mixing in chopped onions, bell peppers, or other veggies. With these tips, you can make a meal that’s both healthy and loved by everyone.
The Role of Portion Control in Healthy Meatloaf Consumption
Portion control is key to eating healthy meatloaf. Knowing the right serving sizes and pairing meatloaf with other healthy foods is important. Traditional meatloaf can have over 900 calories per serving.
To control portions, try baking meatloaf in mini loaves or muffin tins. This way, you can have better-sized servings and cut down on calories. Here are some tips for eating healthy meatloaf:
Aim for extra-lean ground beef with 5% fat or less
Use a suggested liquid addition of 1/4 cup of tomato juice, wine, or broth per pound of meat
Mix vegetables into the meatloaf, using a ratio of 1 part diced onions, diced green peppers, or grated vegetables to 3 parts ground meat
By following these tips and controlling portions, you can enjoy meatloaf as part of a healthy diet. Always make sure the meatloaf is cooked to at least 160°F (71°C) for safety.
Nutrient
Per Serving
Calories
178 kcal
Carbohydrates
13 g
Protein
16 g
Fat
6 g
Nutritional Benefits and Drawbacks
Looking at meatloaf’s nutritional side, it’s key to check the facts. A slice of meatloaf has about 240 calories, 18g of fat, 6g of saturated fat, and 390mg of sodium. It also has a good amount of protein, around 16g per serving.
But, meatloaf has its downsides. It’s high in fat and sodium. To make it better, use leaner ground beef, like 90% lean. Or try ground turkey or chicken. The American Heart Association says these are better for your heart than pork and beef.
Here’s a table comparing different meatloaf options:
Meatloaf Type
Calories
Fat (g)
Sodium (mg)
Classic Meatloaf
240
18
390
90% Lean Ground Beef Meatloaf
225
12
350
Ground Turkey Meatloaf
255
10
300
Knowing the good and bad about meatloaf helps you choose better. You can pick healthier options for your meals.
Alternative Meatloaf Recipes for Special Diets
Looking for meatloaf recipes that fit your diet? You can try chicken or turkey meatloaf. These options are leaner but just as tasty as the traditional kind.
There are many choices for special diets. You can find low-carb, gluten-free, or plant-based meatloaf. Try using almond flour or veggies like mushrooms instead of meat.
Low-Carb Variations
Low-carb meatloaf uses almond flour or coconut flour. It also uses lean meats like chicken or turkey. This makes it lower in fat and carbs.
Gluten-Free Options
Gluten-free meatloaf uses gluten-free oats or quinoa. You can also use gluten-free breadcrumbs for texture.
Plant-Based Alternatives
Plant-based meatloaf uses black beans or tofu. You can also use veggies like mushrooms or eggplant. This makes a meatless option that’s just as good.
Popular alternatives include chicken, turkey, and vegetarian meatloaf. You can add unique spices to make it even better. With a bit of creativity, you can make healthy meatloaf that you’ll love.
Tips for Preparing Heart-Healthy Meatloaf
To make a heart-healthy meatloaf, follow these tips. Use lean ground beef with 80% lean and 20% fat. Also, reduce sodium by using herbs and spices for flavor. Add healthy fats like olive oil.
Here are some more tips for a heart-healthy meatloaf:
Use 2 lbs of lean ground beef. Add 1/2 cup of steamed broccoli and 1/4 cup of roasted red pepper. This boosts fiber and antioxidants.
Add 1/4 cup of ketchup for flavor. It keeps sodium levels low.
Use 2 egg whites to bind the meatloaf. This reduces cholesterol compared to whole eggs.
Cook the meatloaf at 350° F for one hour. Make sure it reaches an internal temperature of 160° F for safety.
By following these tips, you can make a tasty and healthy meatloaf. It’s great for a weeknight dinner or a special occasion.
The nutritional breakdown per serving of this heart-healthy meatloaf is:
Nutrient
Amount
Calories
232 kcal
Carbohydrates
18 g
Protein
26 g
Fat
6 g
Sodium
693 mg
When to Include Meatloaf in a Balanced Diet
To keep your diet balanced, think about the nutritional value of each meal. Meatloaf can fit into a balanced diet if you pair it with the right side dishes. It’s also important to plan your meals well.
When planning meals, look at the nutritional value of meatloaf. Then, balance it with other foods that are rich in nutrients. For example, a side of roasted vegetables or a salad can add vitamins and minerals. Using meal planning strategies helps you make smart choices for your diet.
Here are some tips for adding meatloaf to a balanced diet:
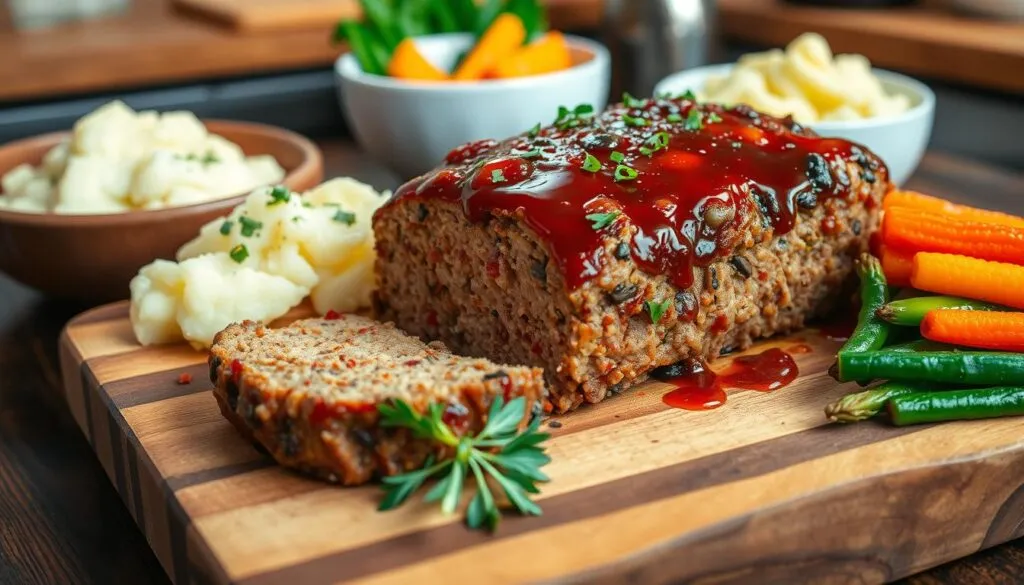
Pair meatloaf with side dishes like roasted vegetables or whole grains.
Use meal planning to balance the nutritional content of each meal.
Consider the portion size of meatloaf and balance it with other foods.
Food
Portion Size
Nutritional Content
Meatloaf
4 ounces
Protein: 61g, Fat: 47g, Net Carbs: 4g
Roasted Vegetables
1 cup
Vitamins and Minerals: varied
By following these tips and planning your meals, you can enjoy a balanced diet with meatloaf.
Conclusion: Making Informed Choices About Meatloaf
Meatloaf can be a good choice for a healthy diet if you think about it carefully. Knowing the good and bad points helps you make informed choices. Choose healthy meatloaf options like lean ground beef and veggies. Also, pick better binders.
Being mindful of how much you eat is important. This way, you get the protein benefits without too many calories or fats.
Whether you like the traditional recipe or want to try new ones, knowing what’s in it is key. This knowledge lets you enjoy meatloaf while keeping your diet balanced. By eating meatloaf with other healthy foods, you can enjoy its taste and stay healthy.
FAQ
Is meatloaf a healthy option?
Meatloaf can be healthy if you choose the right ingredients and control your portions. It’s high in protein, which is great for those wanting more protein. But, it’s important to watch out for the fat and sodium.
What are the common ingredients in traditional meatloaf recipes?
Traditional meatloaf recipes use ground beef, eggs, and breadcrumbs. These give a lot of protein but can also be high in fat and calories.
How can I make healthier meatloaf?
For healthier meatloaf, try using lean meats like ground turkey or chicken. Adding veggies like onions and bell peppers boosts fiber and nutrients.
What are the protein benefits of meatloaf?
Meatloaf is packed with protein, including all essential amino acids. It’s perfect for boosting muscle growth and repair.
What are some hidden sources of fat and sodium in meatloaf?
Traditional meatloaf often has hidden fat and sodium. This includes high-fat meats and too much seasoning. Knowing this helps you choose healthier options.
How do I determine the right portion size for meatloaf?
Controlling your meatloaf portions is key to its healthiness. Pay attention to serving sizes and balance it with other healthy foods.
What are the possible health benefits and drawbacks of meatloaf?
Meatloaf can be nutritious and tasty, but it has fat and sodium. Knowing this helps you make better diet choices.
Are there alternative meatloaf recipes for special diets?
Yes, there are meatloaf recipes for different diets. You can find low-carb, gluten-free, and even plant-based options that are just as good as traditional meatloaf.
What are some tips for preparing heart-healthy meatloaf?
Making heart-healthy meatloaf is simple. Use lean ingredients, cut down on sodium, and cook with healthy fats like olive oil.
How can I incorporate meatloaf into a balanced diet?
To include meatloaf in a balanced diet, plan your meals well. Choose side dishes that complement meatloaf and vary your foods to stay healthy.
Ever wondered What is the secret to moist meatloaf? It’s all about the right mix of ingredients and techniques. To get the best meatloaf, focus on browning, seasoning, and using milk and breadcrumbs. These help keep the meatloaf juicy. With a few easy tips and … Read more
Chicken meatloaf is a tasty and easy dinner option for busy weeknights. It can be made in many ways, depending on what you like. A simple recipe can make a meal that everyone will enjoy. Ground chicken, breadcrumbs, eggs, and spices are common ingredients. They … Read more
Have you ever wondered Can I put cheese in an Airfryer? It’s a question many ask. The answer depends on the cheese type and how you cook it. With the right cheese and cooking method, you can make tasty dishes that everyone will love. Try making melted cheese sandwiches or crispy cheese crisps in your airfryer.
Cooking cheese in an airfryer is quick and easy. It’s faster than using a traditional oven. Air fryers come in different sizes, from 3.8 liters to 4.7 liters. This means you can cook for one or a whole family.
Choosing the right cheese is key. Semi-hard cheeses like cheddar melt well. But dry cheeses, like feta, don’t melt as well. By picking the right cheese and following recipes, you can make delicious dishes easily.
The Truth About Cooking Cheese in an Airfryer
Cooking cheese in an airfryer is a tasty and quick way to make snacks. It’s key to know the cheese’s melting point and avoid overheating. Airfryers cook with hot air, which helps cheese melt evenly and gets crispy.
To get the best airfryer cheese snacks, follow these tips:
Choose cheeses like mozzarella or cheddar, which melt well and have a high melting point.
Preheat the airfryer to about 180°C (350°F) for even cooking.
Cook the cheese for 4-6 minutes to get it melted and crispy.
How Airfryers Work with Dairy Products
Airfryers are great for cooking many foods, including dairy like cheese. It’s important to think about the cheese’s fat content and melting point for the best results.
Safety Considerations for Airfrying Cheese
When airfrying cheese, safety is key to avoid overheating and burning. Keep an eye on the cheese and adjust cooking time to prevent burning or smoking.
Temperature Control Basics
Temperature control is vital when cooking cheese in an airfryer. The best temperature is between 160°C to 200°C (320°F to 400°F), depending on the cheese type and melting level.
Best Types of Cheese for Your Airfryer
Choosing the right cheese for your airfryer is key. Look for cheese that melts well and has a high melting point. This way, it cooks to a crispy outside and a gooey inside. Mozzarella, cheddar, and feta are great choices.
For a creamy taste, mix mozzarella and cheddar. This combo offers a rich flavor and smooth texture. Feel free to try other cheeses like Swiss, havarti, or provolone to find your favorite.
Choose a cheese with a high melting point, such as mozzarella or cheddar.
Use a combination of cheeses for a rich, creamy flavor.
Experiment with different cooking temperatures and times to find the perfect balance of crispy exterior and melted interior.
Try making melted cheese sandwiches, crispy cheese crisps, or cheesy fries in your airfryer. With the right cheese and a bit of experimentation, you can make many tasty dishes.
Cheese Type
Melting Point
Flavor Profile
Mozzarella
High
Mild, creamy
Cheddar
High
Sharp, rich
Feta
Medium
Salty, tangy
Common Mistakes When Airfrying Cheese
When you cook cheese in an airfryer, mistakes can happen. One big issue is setting the wrong temperature. This can make the cheese melt too much or not enough. For instance, making an air fryer quesadilla needs the right temperature for perfect cheese melting.
Temperature Setting Errors
Understanding cheese melting points is key. Most cheeses start melting at 130-180 degrees F. Air fryers cook at 300-400 degrees F, which can make cheese ooze. Finding the right balance is essential for easy airfryer cheese dishes.
Preparation Missteps
Not preparing well is another mistake. Using parchment paper makes cleanup easier and prevents cheese from sticking. Also, picking the right cheese, like halloumi or feta, can lead to better results. These tips help make delicious air fryer cheese dishes, including a perfect air fryer quesadilla.
Can I Put Cheese in an Airfryer? Essential Tips and Techniques
Wondering if you can cook cheese in an airfryer? The answer is yes. With the right techniques, you can make delicious airfryer cheese recipes. First, pick the best cheese for airfryer, thinking about melting point and taste.
Temperature control is key for airfryer cheese cooking. For toasting sandwiches, use 400°F. Cook for 2 minutes on each side, then add a minute for extra crispiness. Try different cheese and bread layers, like 2 to 3 slices and hearty homemade style cracked wheat.
Use full-fat mayonnaise for better flavor and browning
Achieve a high crispiness on the outside while maintaining a soft inside
Be mindful of air fryer fan strength, as lighter ingredients may blow off
Varying air fryer brands can result in differences in cooking time
Follow these tips and try out different airfryer cheese recipes. Choose the best cheese and adjust cooking times for your air fryer. With practice, you’ll master cooking cheese in your airfryer.
Cheese Type
Melting Point
Recommended Cooking Time
Mozzarella
120°F – 130°F
2-3 minutes
Cheddar
130°F – 140°F
3-4 minutes
Parmesan
140°F – 150°F
4-5 minutes
Preparing Your Airfryer for Cheese Cooking
To make perfect airfryer cheese snacks, you need to get your airfryer ready. This means preheating it to the right temperature, preparing the basket, and getting the cheese ready. By doing these steps, you’ll make delicious cheese snacks that will wow your friends and family.
Preheating your airfryer is key when cooking cheese. The best temperature is 400°F. While it heats up, you can get the cheese and basket ready. Make sure to dry the cheese with a paper towel for a crispy outside and a melted inside.
Preheating Guidelines
Preheating your airfryer is easy. Just set it to 400°F and let it warm up for a few minutes. This makes sure it’s hot and ready to cook your cheese perfectly.
Basket Preparation Methods
To stop the cheese from sticking to the basket, spray it with non-stick spray or brush with a bit of oil. This makes it easier to take the cheese out once it’s cooked.
Cheese Preparation Steps
When getting the cheese ready, cut it into thin slices or shred it into small pieces. This helps it melt evenly and prevents it from getting too gooey or stringy.
By following these easy steps, you can make tasty airfryer cheese snacks for any event. Whether you need a quick snack or a tasty appetizer, cooking cheese in an airfryer is a smart choice. With these tips, you’ll soon be a pro at cooking cheese in your airfryer.
Delicious Airfryer Cheese Recipes to Try
Exploring airfryer cheese recipes opens up a world of flavors. You can make everything from gooey cheese sandwiches to crunchy cheese crisps. Mozzarella is a top pick for airfryer cheese, perfect for Air Fryer Crispy Cheese Bites.
These bites are great for quick snacks. Cut 6 mozzarella string cheese sticks into 24 pieces. Cook them in the airfryer at 350 degrees Fahrenheit for 8-10 minutes. They’re perfect for parties, sports events, or movie nights.
Try Air Fryer Cheese on Toast for a quick meal. Toast bread in the airfryer for 2-3 minutes. Then, top it with cheese and cook for 6-8 more minutes. It’s a tasty, easy dish for any time.
Here are some key nutritional facts about these airfryer cheese recipes:
Air Fryer Cheese on Toast: 569 kcal, 23g protein, 41g fat
These recipes are not just tasty but also simple to make. You can experiment with different cheeses and methods to create your own airfryer cheese dishes.
Recipe
Prep Time
Cook Time
Total Time
Air Fryer Crispy Cheese Bites
5 minutes
8-10 minutes
13-15 minutes
Air Fryer Cheese on Toast
5 minutes
10 minutes
15 minutes
Cleaning and Maintenance After Cooking Cheese
After enjoying your airfryer cheese dishes, it’s key to clean and maintain your air fryer. This prevents cheese buildup and keeps it working well. Cleaning an air fryer is simpler than a deep fryer, saving you time.
To begin, take out any leftover food from the basket and pan. For tough residue, soak the basket in warm water for 20 to 30 minutes. Many air fryer baskets can go in the dishwasher, but check your manual first.
Immediate Cleaning Steps
Wash the removable parts (basket, tray, and pan) after each use
Soak the basket in warm water for 20 to 30 minutes for sticky residue
Use a soft sponge and mild soap to clean the air fryer
Long-term Maintenance Tips
Regular cleaning stops grease or food residue from building up on the heating coil. Check the coil every 2 months and clean it when needed. Also, clean the air fryer every few weeks to avoid malfunctions and fires.
Preventing Cheese Buildup
To stop cheese buildup, clean the air fryer after each use or every few uses. Use disposable or silicone liners for easier cleaning. By following these tips, you can enjoy your airfryer dishes while keeping your air fryer in great shape.
Cleaning Frequency
Task
After every use
Wash removable parts
Every 2 months
Clean the heating coil
Every few weeks
Clean the air fryer
Troubleshooting Common Cheese Cooking Issues
When cooking cheese in an airfryer, you might face issues like uneven melting or cheese sticking. It’s important to know why these problems happen and how to fix them. Yes, you can put cheese in an airfryer, but you need to do it right for the best results.
Uneven melting is a big concern. It happens when the cheese isn’t heated evenly. This can make some parts overcooked and others not cooked enough. To solve this, use the best cheese for airfryers and follow the recommended cooking time and temperature. Look for airfryer cheese recipes to find the right one for you.
Here are some tips to help you troubleshoot common cheese cooking issues:
Use the right type of cheese: Choose a cheese that melts well, such as mozzarella or cheddar.
Follow the recommended temperature: Set the temperature to 370°F degrees for optimal melting.
Don’t overcook: Cook the cheese for the recommended time, usually 4-6 minutes, to avoid overcooking.
By following these tips and using the right techniques, you can get perfect results when cooking cheese in an airfryer. Always use the best cheese for airfryers and follow the guidelines to avoid common problems. With practice and patience, you’ll master cooking cheese in an airfryer and enjoy tasty airfryer cheese recipes.
Conclusion: Mastering Cheese in Your Airfryer
Cooking cheese in an airfryer might need some practice, but it’s worth it. You’ll learn about temperature control and how to prepare cheese. This guide will help you become an expert at airfryer cheese cooking.
Don’t be shy to try new things. Experiment with different cheeses, cooking times, and flavors. You’ll soon find the perfect way to crisp the bread and melt the cheese. Enjoy finding your favorite airfryer cheese recipes!
Your airfryer can make everything from classic grilled cheese to creative breakfast dishes. It’s a versatile tool for making your cheese recipes better. With the right techniques and creativity, you can make anything. Happy airfrying!
FAQ
Can I put cheese in an Airfryer?
Yes, you can put cheese in an Airfryer. It’s a great way to make tasty cheese dishes. You can make everything from melted cheese sandwiches to crispy cheese crisps.
What are the best types of cheese for cooking in an Airfryer?
Mozzarella, cheddar, and feta are top choices for the Airfryer. Each cheese has its own special qualities. We’ll show you how to cook them perfectly and share lots of cheese recipes.
What are the safety considerations for cooking cheese in an Airfryer?
Cooking cheese safely in an Airfryer means watching the temperature and time. We’ll explain how Airfryers work with cheese and give you tips for safe cooking.
What are some common mistakes when cooking cheese in an Airfryer?
Mistakes include wrong temperature settings and not preparing the cheese right. We’ll cover these mistakes and offer solutions for perfect cheese dishes.
What are the essential tips and techniques for cooking cheese in an Airfryer?
Success in the Airfryer comes from controlling temperature, time, and choosing the right cheese. We’ll give you detailed advice on melting cheese and making cheese crisps.
How should I prepare my Airfryer for cooking cheese?
Preparing your Airfryer is key for great cheese dishes. We’ll talk about preheating, preparing the basket, and getting your cheese ready. Follow these steps for perfect cheese every time.
What are some delicious Airfryer cheese recipes to try?
There are many tasty cheese recipes for the Airfryer. We’ll share recipes with different cheeses and cooking methods. Plus, we’ll give you tips for making your own unique cheese dishes.
How do I clean and maintain my Airfryer after cooking cheese?
Keeping your Airfryer clean is important after cheese cooking. We’ll show you how to clean it right away and how to maintain it long-term. This will keep your Airfryer working well for all your cheese needs.
How do I troubleshoot common cheese cooking issues in my Airfryer?
We’ll cover common problems like uneven melting and cheese sticking. We’ll give you solutions and tips to fix these issues. With these tips, you’ll make perfect cheese dishes every time.
Wondering How long should you air fry a quesadilla? The time varies based on filling and temperature. Generally, cook at 350F for 8 minutes, flipping halfway. This makes the tortilla crispy and the filling hot and melted. To get a great air-fried quesadilla, pay attention … Read more
Imagine whipping up a tasty air fryer quesadilla in just a few minutes. It’s perfect for those busy weeknights. With an easy air fryer quesadilla recipe, you can make a meal that’s both quick and customizable. It’s a great choice for anyone looking for a … Read more
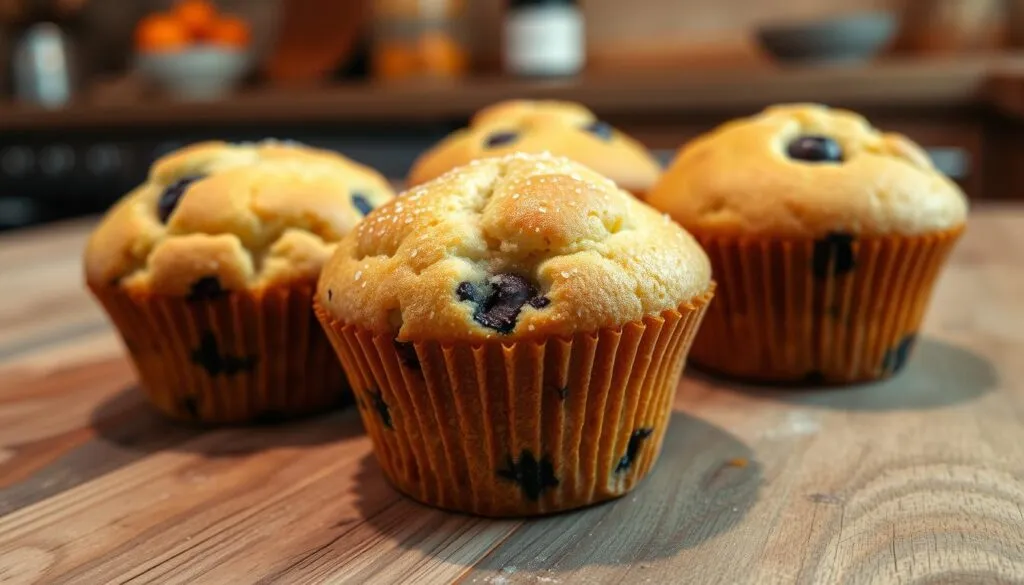
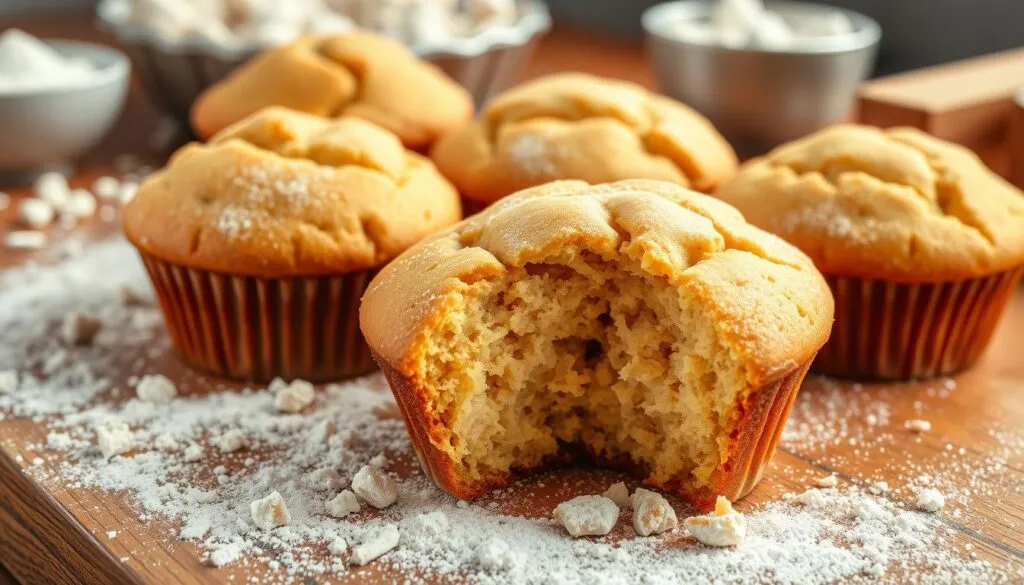
Ever wondered What is the secret to moist muffins? It’s all about the right ingredients, techniques, and how you store them. Muffins are great for lunch, breakfast, snacks, or brunch. To get them right, you need to know the secrets and follow some key tips.
Exploring muffin baking reveals the science behind moist treats. You’ll learn about the importance of fats, avoiding overmixing, and proper storage. With these tips, you’ll make delicious muffins for any time.
Understanding the Science Behind Moist Muffins
To make muffins moist, you need to know the science behind them. Baking great muffins is all about finding the right mix of ingredients and techniques. The key to moist muffins is in how gluten forms, the moisture level, and how temperature affects texture.
It’s important not to overmix the batter. Overmixing can make muffins dense and dry. But, if you don’t mix enough, they can be too soft. Finding the right mix time and method is key to the perfect texture.
The Role of Gluten Development
Gluten is a big player in muffin texture. The flour you use and how much of it can change the gluten level. Using the right flour and mixing it right helps get the gluten and moisture just right.
Moisture Content and Chemical Reactions
Moisture is another big factor in muffin baking. The liquid in your recipe and the ingredients you use can change how moist they are. Chemical reactions, like the Maillard reaction, also play a part in texture and taste.
Temperature’s Effect on Texture
Temperature is also very important. The right baking temperature and time can make or break your muffins. If it’s too hot or too cold, your muffins might end up too dense or dry.
By understanding the science of moist muffins, you can master the art of baking them. With the right ingredients and techniques, you can make moist, delicious muffins for any occasion.
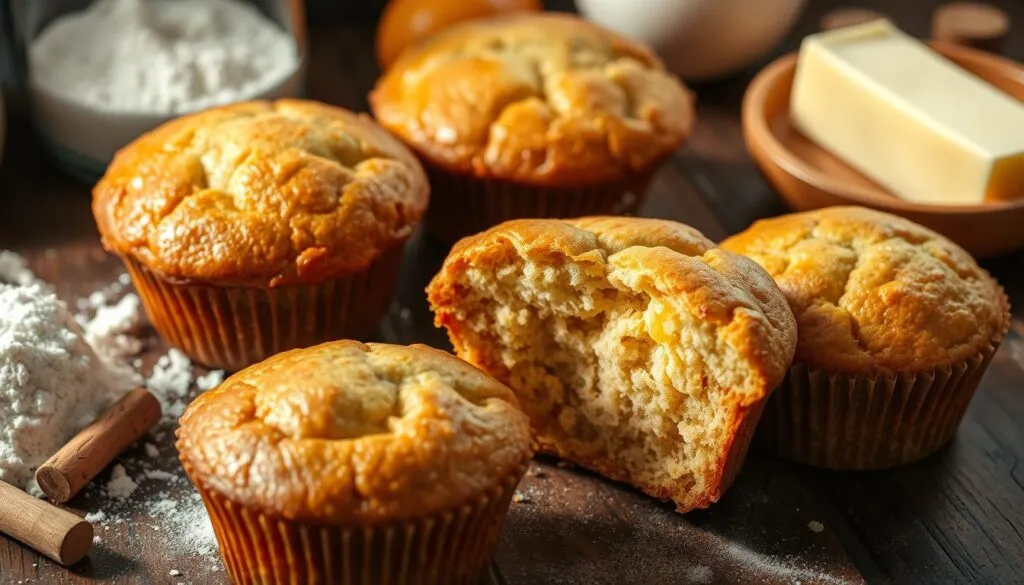
Essential Ingredients That Guarantee Moisture
To make moist muffins, focus on key ingredients. Butter or oil, eggs, and dairy products are vital. The right mix of these ensures a tender, moist crumb. For example, 8 ounces of buttermilk greatly improves the muffin’s moisture.
For the best muffin baking, balance is key. The right mix of sugar, flour, and liquid is essential. The Ultimate Muffins recipe uses 2 1/4 cups of flour, 150 grams of sugar, and 1 tablespoon of baking powder. This balance creates a moist, tasty muffin.
Here are some key ingredients for a moist muffin recipe:
Buttermilk: 8 ounces (1 cup)
Eggs: 2-3 eggs, depending on the recipe
Sugar: 150 grams, combining granulated and brown sugar
Flour: 2 1/4 cups (286 grams) of all-purpose flour
By following these tips and using the right ingredients, you can make moist, delicious muffins. Always choose fresh, high-quality ingredients for the best results.
Ingredient
Quantity
Buttermilk
8 ounces (1 cup)
Eggs
2-3 eggs
Sugar
150 grams
Flour
2 1/4 cups (286 grams)
The Perfect Oil-to-Butter Ratio for Muffins
Getting the right oil-to-butter ratio is key for moist muffins. Using oil instead of butter can make your muffins tender and moist. The best ratio varies based on the muffin type and personal taste.
Oil can add a special flavor and texture to your muffins. It makes them tender and moist. Butter, on the other hand, adds a rich, creamy taste. Mixing both can lead to amazing results and impress everyone.
Choosing the Right Oil
There are many oils to choose from for muffin baking. Canola oil, coconut oil, and olive oil are popular. Think about the flavor and texture you want in your muffins. For a light taste, canola oil is good. For a richer flavor, coconut or olive oil might be better.
Combining Oil and Butter
To mix oil and butter, start by replacing some butter with oil. A good mix is 1/2 cup melted butter and 1/4 cup oil. You can adjust this to your liking and the muffin type. This mix creates a moist, delicious muffin for any time.
Here are some tips for moist muffins when mixing oil and butter:
Choose a fresh, flavorful oil.
Avoid overmixing to prevent tough muffins.
Use the right amount of liquid for the best texture.
By following these tips and experimenting with ratios, you can make moist muffins. Always use quality ingredients and avoid overmixing. With practice, you’ll get great at baking moist muffins that everyone will enjoy.
What is the Secret to Moist Muffins? Expert Bakers Reveal All
Expert bakers say the secret to moist muffins is using the right ingredients and techniques. They also stress the importance of how you store them. High-quality ingredients like fresh leavening agents and real butter make a big difference.
Mixing the batter gently is key. Overmixing can make muffins dry. Adding fruits or vegetables, like grated apples, adds moisture. The batter should be thick but pourable for the best results.
Proper oven conditions are also vital. Using a tray of hot water for steam helps keep the muffins moist. Baking at a high temperature first creates steam, helping them rise.
Using high-quality ingredients, such as fresh leavening agents and real butter
Employing gentle mixing techniques to preserve moisture
Incorporating fruits or vegetables to naturalize added moisture levels
Maintaining proper oven conditions, including using a tray of hot water for steam
By following these tips, you can make moist muffins that everyone will love. Whether you’re new to baking or experienced, the right ingredients and techniques are the key. They will help you master the art of making moist muffins.
Ingredient
Quantity
All-Purpose Flour
3 cups (375g)
Unsalted Butter
1/3 cup (71g), melted and slightly cooled
Vegetable Oil
1/3 cup (80ml)
Granulated Sugar
1 cup (200g)
Mixing Techniques That Lock in Moisture
Mixing techniques are key to making muffins moist. The muffin method is best. It involves mixing wet and dry ingredients separately and gently folding them together. This method prevents overmixing, which can make muffins dry and dense.
To get the muffin method right, it’s important to use ingredients at room temperature. This ensures they mix smoothly. Also, mix the batter just until the ingredients come together. This helps keep the moisture in the muffins balanced.
For perfect muffins, use full-fat dairy products and add fruits and vegetables for extra moisture. And remember, don’t overbake. By following these tips and mastering the muffin method, you’ll make moist and delicious muffins.
Here are some key takeaways for mixing techniques that lock in moisture: * Use the muffin method to combine wet and dry ingredients * Mix ingredients at room temperature * Avoid overmixing the batter * Incorporate natural moisture sources, such as fruits and vegetables * Don’t overbake your muffins
Common Mistakes That Lead to Dry Muffins
To make moist muffins, avoid common mistakes. Overmixing the batter is a big no-no. It makes the muffins dense and tough. This happens because mixing too much develops the gluten in the flour, losing moisture. Mix your ingredients gently until they just come together, then stop.
Using the right baking time and temperature is also key. Overbaked muffins are dry and crumbly. Underbaked ones are soggy and not good. Use a toothpick to check for doneness and adjust your baking time as needed. These tips will help you make moist and tasty muffins.
Remember, use the right amount of liquid and don’t overfill your muffin tin. By following these tips and avoiding common mistakes, you’ll make moist and delicious muffins. Everyone will love them.
Here are some common mistakes to avoid:
Overmixing the batter
Using the wrong baking time and temperature
Not using enough liquid ingredients
Overfilling the muffin tin
By being careful of these mistakes, your muffins will be light, fluffy, and full of flavor. You’ll unlock the secrets to moist muffins and master the art of making them.
Storage Solutions to Maintain Moisture
To keep your muffins fresh and moist, proper storage is key. Storing muffins right is as important as making them moist. If not stored well, a moist muffin can quickly become dry.
Cool your muffins in the pan for 2 minutes before moving them to a wire rack. This step helps prevent sogginess and keeps them fresh. For longer storage, freezing your muffins for up to 2 months is a great option. It’s a good way to keep them moist and fresh for longer.
Best Container Options
Use an airtight container lined with paper towels to store muffins at room temperature. This absorbs excess moisture, keeping them fresh. You can also store them in the fridge for up to 5 days, but they might dry out a bit.
Temperature Considerations
Room temperature is best for storing muffins. Refrigeration can make them dry. If you need to store them for a long time, freezing is a good option. Frozen muffins can be thawed in the fridge overnight for the best taste.
Freezing Guidelines
To freeze muffins, place them on a baking sheet and flash freeze for 2 hours. Then, put them in a freezer-safe bag or container, removing air to prevent freezer burn. Frozen muffins can last up to 2 months.
By following these storage tips, you can enjoy fresh and moist muffins for longer. Always store muffins in an airtight container. Freezing them is a great option for longer storage. With these tips and a moist muffin recipe, you’ll have delicious muffins in no time.
Storage Method
Storage Time
Room Temperature
Up to 4 days
Refrigerator
Up to 5 days
Freezer
Up to 2 months
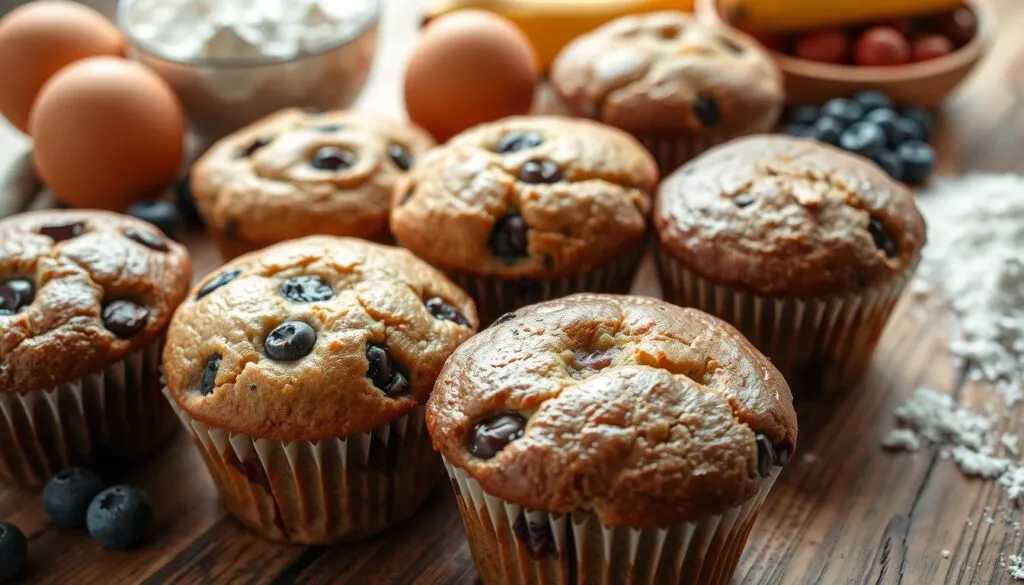
Adding Moisture-Rich Ingredients
To make muffins moist, it’s key to use ingredients that hold moisture well. Fresh fruits like blueberries or bananas add sweetness and moisture. Vegetable options, such as zucchini or carrots, also bring moisture and flavor.
Here are some tips to add these ingredients effectively:
Choose fresh fruits that are in season for the best taste and moisture.
Avoid overmixing the batter to prevent tough muffins.
Adjust the liquid in the recipe based on the moisture of the added ingredients.
By using these moisture-rich ingredients and following these tips, you’ll soon be baking perfect muffins. Remember to balance the ingredients and adjust the recipe as needed for the best texture and flavor.
With practice and patience, you’ll master making moist muffins. Your family and friends will love the perfect muffins you bake.
Ingredient
Moisture Content
Benefits
Fresh Fruits
High
Natural sweetness and moisture
Vegetable-Based Options
Medium
Moisture and flavor
Yogurt
High
Moisture and tenderness
Temperature and Timing: The Critical Factors
To make moist muffins, knowing about temperature and timing is key. The best baking temperature for muffins is 375°F (190°C). This keeps them moist and prevents them from drying out. Using the right temperature and baking time makes muffins tender and moist.
Some important things to think about when baking muffins include:
Using high-quality ingredients, such as fresh eggs and flavorful fruit, to improve muffin texture and taste
Avoiding overmixing, which can create a tough, dense texture by developing gluten excessively
Allowing the muffin batter to rest for 15-30 minutes to enhance hydration and tenderness
By following these tips and using the right temperature and timing, you can make perfect, moist muffins. Remember to fill muffin cups two-thirds full to prevent uneven baking and maintain moisture. With practice and patience, you’ll be able to master the secrets to moist muffins and enjoy delicious, homemade muffins whenever you want.
Also, using an oven thermometer ensures proper heat, which is essential for consistent baking results. By combining these muffin moisture tricks with the right ingredients and techniques, you’ll be well on your way to creating moist and delicious muffins.
Ingredient
Importance
Fresh eggs
Improves texture and taste
Flavorful fruit
Enhances flavor and moisture
Sugar
Attracts moisture, balances flavor
Troubleshooting Your Muffin Problems
When baking muffins, you might face issues like dense centers, dry edges, and sticky tops. To fix these problems, it’s key to know the causes and use the right tips for moist muffins. A moist muffin recipe can be achieved by following some simple guidelines.
Common muffin issues can be solved by adjusting how you mix, the ingredient ratios, and the baking time. For example, overmixing can make muffins dense and tough. Underbaking can cause sticky tops. To avoid these, mix the batter just until combined and bake at the right temperature and time.
Dealing with Dense Centers
To avoid dense centers, don’t overmix the batter and don’t overbake the muffins. A moist muffin recipe needs the right balance of ingredients like flour, sugar, and liquid. Using cake flour can also help make the muffins tender and moist.
Fixing Dry Edges
Dry edges often come from overbaking or too much flour. To fix this, try baking for less time or use less flour. Adding sour cream or yogurt can also add moisture to the batter.
Preventing Sticky Tops
Sticky tops can be due to underbaking or too much sugar. To prevent this, bake the muffins at the right temperature and time. Try using less sugar and adding more flour to absorb excess moisture.
By following these tips and troubleshooting common issues, you can make delicious and moist muffins. Always use fresh ingredients, don’t overmix the batter, and bake at the right temperature and time.
Issue
Cause
Solution
Dense Centers
Overmixing, overbaking
Mix batter just until combined, bake at right temperature and time
Dry Edges
Overbaking, too much flour
Reduce baking time, use lower flour ratio, add extra moisture
Sticky Tops
Underbaking, too much sugar
Bake at right temperature and time, reduce sugar, add extra flour
Conclusion: Mastering Your Muffin Game
Making moist and tasty muffins is all about understanding baking science, using the right ingredients, and mastering key techniques. This guide has given you the knowledge and practical tips to take your muffin game to the next level. Whether you’re a pro or just starting, you’re now ready to make amazing muffins.
You know now how gluten and moisture are key, and how to get the perfect mix of oil and butter. Adding fresh fruits and veggies and watching your temperature and timing will help you make moist muffins every time.
Keep practicing and experimenting with your muffin skills. Remember the expert advice and tips from this article. With practice, you’ll become a pro at making moist muffins. Impress your loved ones and even the pickiest pistachio muffin fans. Happy baking and enjoy your delicious creations!
FAQ
What is the secret to making moist muffins?
To make moist muffins, you need to understand the science behind it. Use the right ingredients and mix them properly. Also, know how to store them well. By doing these things, you can always bake moist muffins.
How does gluten development affect the texture of muffins?
Gluten is key to muffin texture. Too much mixing makes muffins dense and dry. But, not enough mixing makes them tender and moist. Finding the right balance is important for moist muffins.
What are the essential ingredients for making moist muffins?
For moist muffins, use the right amounts of butter or oil, eggs, and dairy. Balancing these ingredients is key to a tender, moist crumb.
What is the ideal oil-to-butter ratio for moist muffins?
The ideal ratio of oil to butter depends on your preference and the muffin type. Mixing both can offer moisture and flavor.
What are the secrets that expert bakers use to make moist muffins?
Expert bakers use the right ingredients, techniques, and storage methods. Mastering these can help you make perfect, moist muffins every time.
How do mixing techniques affect the moisture content of muffins?
The right mixing techniques, like the muffin method, are important. Keeping ingredients at the right temperature and mixing at the right time also helps.
What are the common mistakes that can lead to dry muffins?
Avoid overmixing and using the wrong baking time and temperature. Not using enough liquid can also cause dry muffins. These mistakes can ruin the moist texture.
How can storage solutions help maintain the moisture in muffins?
Storing muffins in the right container and at the right temperature is key. Following freezing guidelines also helps keep muffins moist for longer.
What are the benefits of using moisture-rich ingredients in muffins?
Moisture-rich ingredients like fresh fruits and vegetables add moisture and flavor. They make muffins more delicious and moist.
How do temperature and timing affect the moisture in muffins?
The right temperature and baking time are essential for moist muffins. Paying attention to these factors ensures moist, tasty muffins every time.
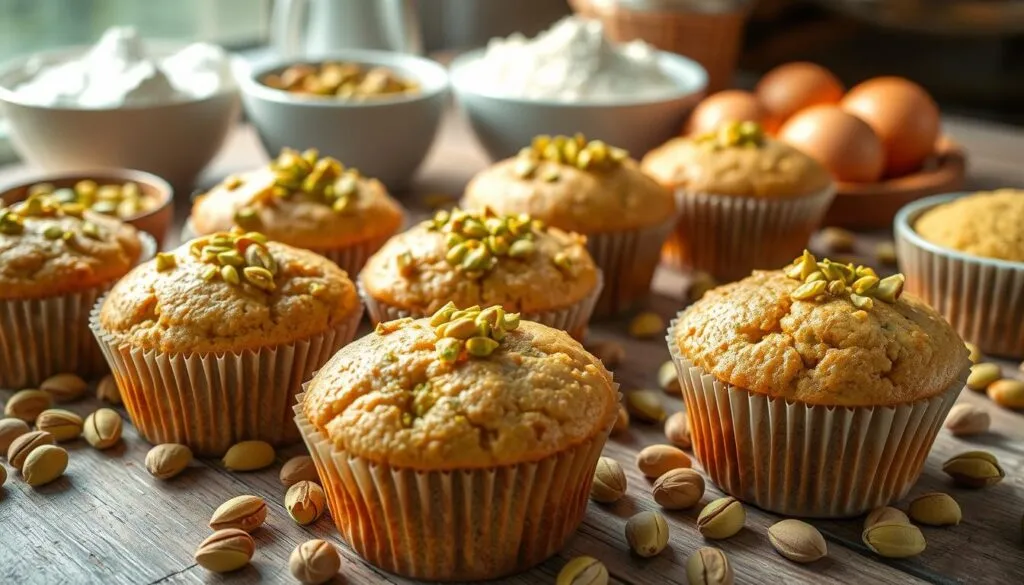
Thinking about adding pistachio muffins to your diet? You might ask Are pistachio muffins good for you? These muffins have a rich flavor and a satisfying crunch. They can be a healthy choice because of pistachios’ nutritional benefits. A typical pistachio muffin has about 232 … Read more